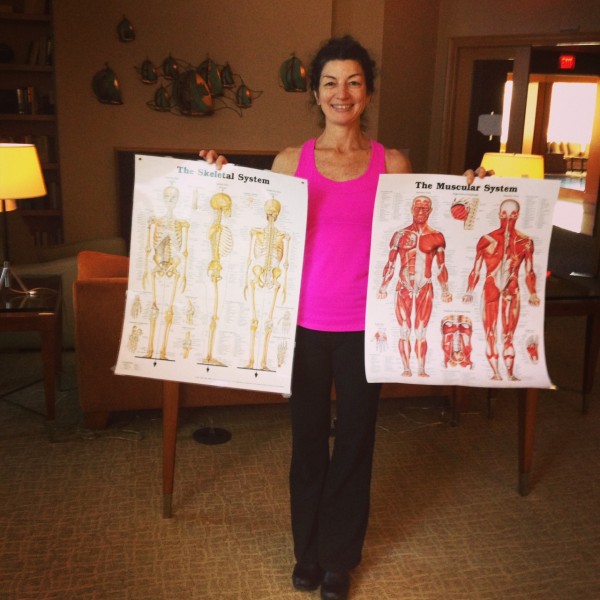
As a yoga teacher, we’re faced with lots of options when it comes to what to say in class. We can talk about the pose name, the actions, the anatomy or the spirit of the pose–among other things. When it comes to the anatomy behind the pose, or anatomy in general, unless you’re comfortable with the subject, you might stray away from including this in your verbal instructions.
It is true that it takes a long time to become comfortable with anatomy itself and then apply it to yoga. It’s also a subject that is ever changing and although the fundamentals don’t change, the research and science around the body is always in transition. This means that you need to always keep reading, researching and attending workshops and trainings with knowledgeable teachers.
But there are some simple, helpful anatomical tips you can speak to in class. These are things you can research deeper than I will provide here in terms of the background but I will give you the general topics:
Cuing students to bend their knees in Downward Facing Dog and forward folds, while additionally lifting the sitting bones as they do this. You’d be amazed at how many people don’t know what their “sitting bones” are on their body. It makes sense that you “sit” on them but it’s helpful to literally point them out on your body. The technical term is “ischial tuberosities” but you’d never really use that in class. The idea is that for many people, their hamstrings are so tight, and because the hamstrings begin on the ischial tuberosities, it pulls the pelvis down when the person tries to come into Downward Dog or a forward fold (even when seated). So, the corrective action is to LIFT the sitting bones WHILE forward folding AND bending the knees.
Many students, when they hear your cue in Downward Dog to “bend your knees” Â will erase all the good bend they have, helping them to get into a longer spine, if you tell them also to “push up and back.” You need to suggest not only “bending the knees” but “keep them bent, as you lift your sitting bones high.”
Draw belly to spine and relax upper ribs (under chest) when in standing poses, especially Warrior 1. The first teacher to ever cue me about my “upper ribs” was Natasha Rizopolous and it changed my Warrior 1. Many students will have tight hip flexors, specifically the psoas muscle, and as they reach up to come into Warrior 1, that shortened muscle will throw their pelvis a downward tilt, thus creating a hyperextended tailbone (they stick their tailbone out behind them). To better stretch the psoas and to relieve pressure on the lower back, the abdominals need to be engaged, specifically the rectus abdominus (which runs up the middle of the front of the body) and the upper ribs, or under the chest, needs to soften or relax.
Like the first tip above, these two actions need to happen together so that you’re cueing them to “draw your belly in” and “relax your upper ribs” at the same time.
Keep elbows in and close to the sides of the body in Low Push Up. There has been so much written of late regarding the transition from High to Low Push Up. There are some excellent articles on www.yoganonymous.com and other sites that speak about all the key actions that need to occur when doing this transition. These articles, and other, talk about the risk to the shoulder joint and the rotator cuff muscles if this movement is done wrong. I do believe that all of this is true. I have chosen to focus on ONE aspect of all the key actions because I think this is the one we most commonly see done incorrectly (although a close second would be students going too low, below elbow level).
The action of “drawing the elbows into the sides” while moving to Low Push Up engages the serratus anterior, which basically is a muscle that starts on your ribs and connects to the inside (medial) aspect of your shoulder blades (scapula). This will prevent the shoulders from riding up toward the ears, thus creating more of a “collapse” into the pose.
The best way to teach this is to have students drop their knees when moving into Low Push Up. Hold Low Push Up for a few breaths while having them squeeze their elbows in.
These cues will help bring some relief to bodies with tight or weakened muscles and help them experience the poses with greater ease. It’s also a good place to start if you wish to research further key muscles that are used in yoga.

hi im about to finish a yoga teacher trainer course power vinyasa 200 hours i have my assesment on my class nxt week for marking and feed back from our teachers.
im struggling to remember the connectting poses in sun a and sun b and you please help me?
i love yoga im just struggling with all the book stuff i need to see
thanks kel
Kelly, hi there! Thanks for buying my yoga anatomy courses. I saw that you bought those yesterday. I would say in order to teach Sun Salutations, sometimes it’s helpful to write out the sequence and talk through it. Then do it yourself and talk through it to yourself. Once you’ve done that a few times, practice it on a friend. Remember, it’s not about doing anything perfect; it’s about being yourself. I always find that grounding down into my legs and feet before teaching helps me. Before you say a word, close your eyes and take a few deep breaths. Feel your feet. Then open your eyes and begin. As you feel nervous, come back to that feeling of grounding into your feet. You’ll be great! Let me know how it goes. Good luck! Karen