I’ve found that over the years, as my teaching has shifted exclusively to focusing on anatomy, the number of questions I get after class has increased. I love this because there’s nothing better than getting some good questions after class. To me, that illustrates that the students are engaged in the process, curious about how the body works and looking for ways to better understand the practice.
This week, before class, one of the students said to me, “I am so confused by Bow Pose!” I just feel so tight going into that pose and everyone else seems to be able to do it so easily. Any tips you can give me would be great!”
So, nothing like setting the bar before you teach, right? But I love that! I love that someone put it out there, at least in terms of what was on their mind. Quite frankly, I wish there was a class format where we could have students asking questions during class. That’s when they really need the information; not afterwards! And, I’ll bet whatever question they have, a bunch of other people have as well.
In any event, as I taught class, I provided specific cues in Bow Pose that were geared towards her question but were shared with the class, keeping in mind, again, that a number of people most likely shared her question. For so many students, they share the same central question: “What is the point of this pose? What should I be doing?”
So, with that in mind, here are some cues for Bow Pose:Â
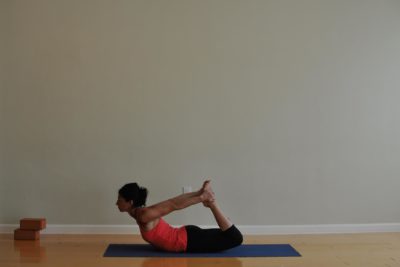
(from lying prone, on the belly)
- Reach back and grab the outer edges of the feet
- Press the front of the thighs down and lift the tailbone
- Press the feet back into the hands, gently and without force
- Lift the chest off the floor
- Take 3-5 breaths
So, now that I’ve covered some basic cues, let’s talk about the point of the pose and the anatomy behind it. Â Here’s a short list of what’s involved:
- The hips are in extension
- The shoulders are in external rotation
- Muscles lengthened include the major hip flexor, the psoas as well as the rectus femoris, which is the long head of the quadriceps that starts on the pelvis (anterior inferior iliac spine), along with the pectoralis major and minor in the chest and subscapularis, one of the rotator cuff muscles
- Muscles contracting include the rhomboids in the upper back, the teres minor and infraspinatus in the rotator cuff the gluteus maximus in the hips and the hamstrings in the thighs
- The pelvis couternutates, or said another way, the front of the pelvis tips forward and the tailbone “scoops” up and back. This action helps create the backbend that’s apparent in the pose.
What is the major point of the pose? To lengthen the hips and open the chest.
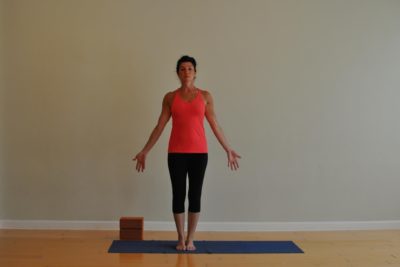
Here are some other poses that have a similar focus:Â
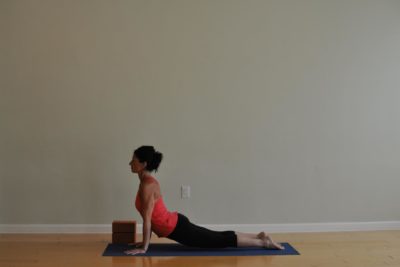
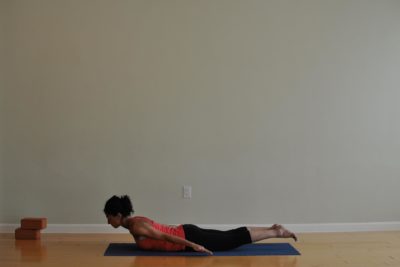
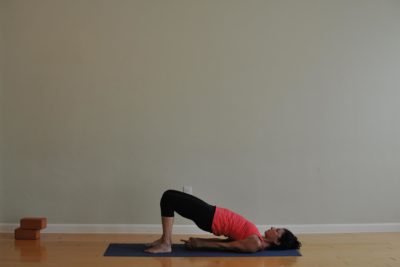

In order: Upward Dog, Locust, Bridge, Camel
These poses all share the same key action of hip extension and shoulder external rotation. Each pose creates a bigger angle between the thigh and the chest, generating that length in the hip flexors that can be challenging for students who sit all day or do other things that shorten the hips, such as running or cycling. Also, keep in mind the power for the poses comes from strength in the gluteus maximus and hamstrings, which can be weakened by constant sitting all day. Each pose also asks for external rotation in the chest which is a challenge for people who hunch all day because of the shortened pectoral muscles that result from this non-stop posture.
For many teachers, understanding the anatomy is different from understanding the cues to give and the alignment. I’ve worked with teachers in my anatomy workshops who ‘get how to cue’ the pose but have very little understanding of the ‘why’ behind the cue and some of the basic anatomy at work. This is one of the reasons why I love to focus on the anatomy; because for teachers and students both, it can be seal in a greater understanding when one knows the actions to take in a pose and the “why” behind it. And for teachers, it helps them answer questions with more depth.
If you’d like to learn more about the anatomy behind yoga, my latest online course will give you all you need to know in my “bare bones yoga” essential style. I like to share the key aspects of anatomy versus every single detail, knowing that you need the essentials to seal in that understanding and to help you do it quickly and easily. My course, “Your Yoga Anatomy Blueprint” was released this month and is on special for $145 until July 1, when it goes up to its regular price of $214. To hear more about it, you can watch this video.Â
To get the course and watch some free previews of the modules, click this link and scroll to the actual course itself, called “Your Yoga Anatomy Blueprint.”Â
Thanks so much for reading and please comment below if you have a question or thought!
really liked the explanation – so much clearer than what i’ve been saying
Wonderful! So glad you liked the detail. Let me know if there are other things you want to see covered. Thanks!