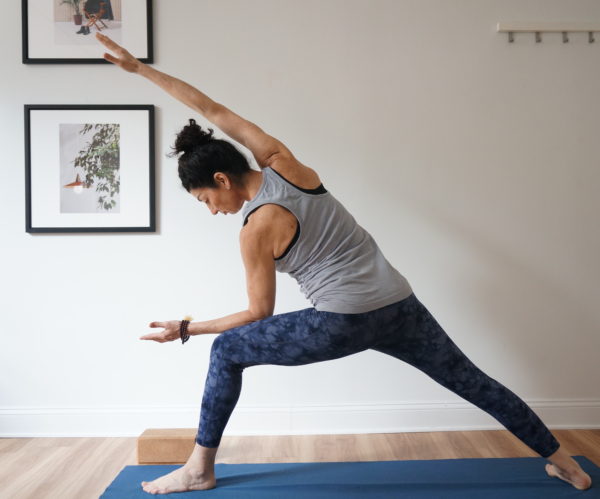
As you learn different aspects of anatomy, you’re usually psyched to bring it into your classes. One of the challenges to doing this is how to do it without overwhelming your students and killing the mood. No one wants to go into a yoga class and hear the “smarty pants” teacher drone on about internal and external rotators for instance. So, the challenge for teachers is to share anatomy in practical, understandable ways. Here are 2 practical ways to bring shoulder anatomy into your yoga teaching:
Lesson: Internal and external rotation. Just as with the hips, the shoulders internally and externally rotate. The challenge with the shoulders is that for most people, they spend WAY too much time in internal rotation versus external rotation. This kind of imbalance posturally can create muscles that are too tight on one side of the body and too loose and weak on the other. In this case, we’re talking about internal rotators like the subscapularis and teres major and external rotators like teres minor and infraspinatus. The challenge is to share not only actions that will strengthen the external rotators but give students information about the anatomy so they can correct their posture throughout the day.
How to do it: Start students out in Tabletop pose (hands and knees). Move them through Cat/Cow and share with them how the shoulders “turn in” as they’re in Cat and “turn out” as they’re in Cow. Proceed into Downward Dog and cue them to roll their upper arm bones outward to avoid that feeling of “hunching” towards the floor as they were when in Cat. Bring them up to standing, move to a forward fold and have them interlace hands behind the back. Cue to contract shoulder blades together, noting how this action will strengthen muscles that are often weak from all the hunching we do all day. Bring them up to standing. Have them roll shoulders in and then roll them back, contracting the same muscles again (rhomboids). Throughout class, look for opportunities to go back to the same theme: in Upward Dog, cue to the rhomboids. In any bind behind the back, same thing. As they move from High to Low Push Up, encourage them to avoid hunching by pressing into the floor. If need be, return to Cat/Cow every once in a while and reinforce the lesson.
Lesson: Strengthen shoulders. So much of the practice involves being on the hands with the palms down and as above, due to all the hunching we do all day, the shoulders can be a bit weak. Weight bearing on the arms requires a collaborative effort in the whole body: core, legs, feet AND shoulders all work together in poses like Downward Dog and Plank but often students over-effort in the shoulders and forget about the rest of the body’s impact. However, to strengthen shoulders, cue students to the muscle called the serratus anterior. This muscle acts in the opposite way as the above mentioned rhomboids in that instead of drawing the shoulder blades together (adduction) it moves them apart (abduction), thus flattening them and wrapping them around the back. We see this in Cat Pose but we also need to cue to it in Plank otherwise students will sink towards the floor. The serratus gives our Low Push Up more integrity and helps stabilize the shoulders through the Sun Salutations which can be quite hard on the shoulders if there’s little strength.
How to do it: Start students in Tabletop pose. Have them gaze at hands and WITHOUT moving their gaze, have them take small Cat/Cow movements. Avoiding bringing the head into the movement eliminates to some degree the action of the rhomboids to draw the shoulder blades together and instead allows you to emphasize the action of the serratus by cueing to how the shoulder blades move apart. From this, move students into Dolphin pose and emphasize pressing down into the forearms and wrapping the inner eyes of the elbows towards each other as they hold. Ask them if they feel the shoulder blades wrapping to the back (yes, ask them to respond!) Be sure to cue that their head is off the floor and they should not feel like their shoulders are “dumping” into their neck. As you move through class, cue to the serratus as you move them through High to Low Push Up and especially if you take them into a straddle forward fold with the arms in Low Push up position.
I’ll be posting a You Tube video tomorrow explaining all of this in video form so look for that on my You Tube channel. (you can get to it right from the video page here on my website)
It’s one thing to learn anatomy for yoga, but it’s another skill to bring it into your teaching in understandable ways. If you’re looking for more ways to do just this, come to my workshop on May 19th in Boston. “The Bare Bones Yoga Anatomy Lab: Shoulder Intensive” will be a half day event filled with all sorts of practical ways you can share shoulder anatomy with your students. The link below will give you ALL the details. You’ll practice, learn through lecture and then we’ll move to the practical application discussion. Yoga teachers will get CEU’s, breakfast and lunch are provided, all in a gorgeous space on Newbury Street right in the heart of Boston! If you sign up before the end of tomorrow, you’ll get my 200 page anatomy manual, regularly $65, for free! There are only 9 spots left and the LAST DAY to sign up is 5/17 (which is two days before the event). Do not wait until the last minute to get your spot, learn about this critical information and shift your teaching to the next level.
Helping your students understand anatomy can increase the impact you have on them but giving them key information they can use all day to feel better. Help them move smarter by sharing this important information about anatomy.
To sign up, click here.Â

Really good and practical info, as always!
Deby, yay! Glad you liked it! Can you make it to the webinar today at 4 pm EST?