When I started teaching yoga, I wasn’t familiar with the idea of a “kinetic chain.” It was only many years later, when I was studying for my Certified Personal Training exam, that the concept came up in my textbook. It describes the body’s structure using the idea of a “chain;” think of a long chain with links connected to each other. If you were to lay out the chain on the floor and move one of the links, it would effect the links right above and below it and depending on how much you moved the chain, it might just effect other links further down the line.
It’s a beautiful and very apt metaphor we can use to apply to the body. The body is indeed made up of parts but the parts are interrelated. If we hurt our knee, we might feel pain in our hip. If we’re in a yoga pose and our feet are out of alignment, it might effect the position of our hips. You get the idea, right?
This idea can be used to understand some of the common cues teachers are taught when it comes to yoga poses. However, without explaining this fundamental concept, often teachers are just left to memorizing cues for each pose. After that, all they can do is just repeat what they memorized and well, I bet you know that this approach to teaching most certainly isn’t fun and it definitely isn’t very empowering.
So, let’s apply this idea to the body in the context of looking at Warrior 1 and 2.
Now, I know in a blog post it’s not as easy to see this so I’ll make a video for my You Tube channel also. But for now, let’s see what we can review here in the blog. So, now you have a better idea of how the body acts as a kinetic chain, especially when we look at the “line” of the body from let’s say, the right hip all the way down to the foot. So let’s now think about that when someone’s in Warrior 1.
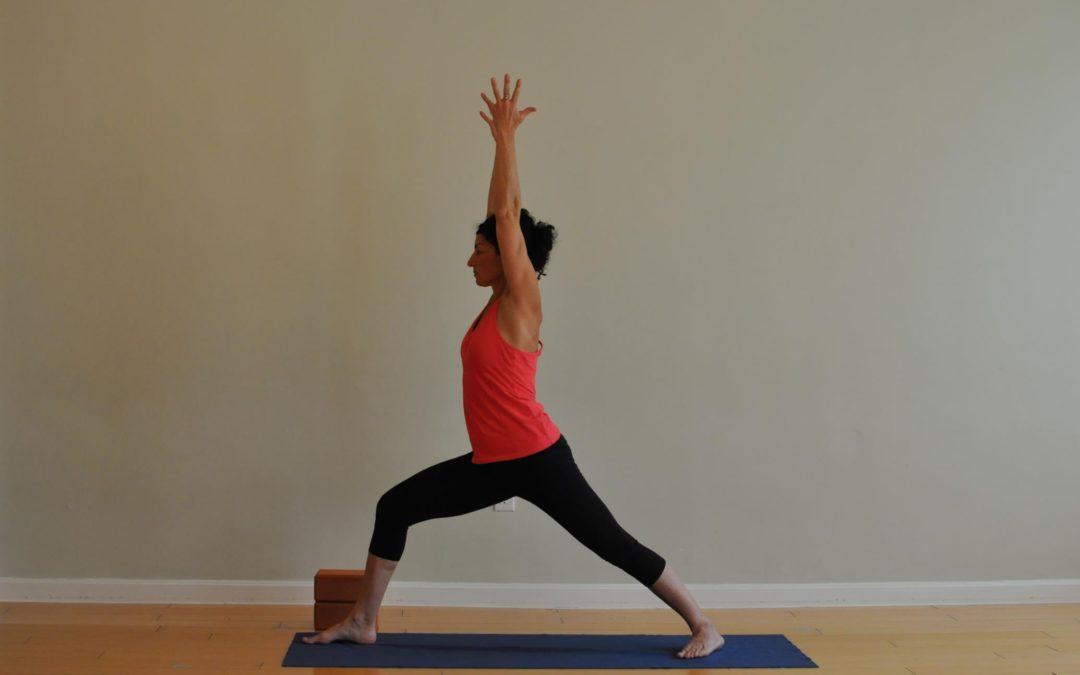
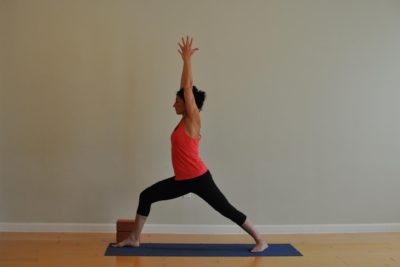
In Warrior 1, the general position is that the hips face the front of the mat, commonly referred to as “centering your hips.” If we have the right foot forward, we can then describe the position of EACH hip by saying the right hip is in flexion and a bit of external rotation and the back hip is in extension and a bit of internal rotation. Now, I’m sure you’ve seen students having difficulty centering their hips to the front of the mat and oftentimes, it’s because the body acts like a chain that this issue comes up. If their back foot is turned out, even slightly, their left hip will turn out as well. This will result in no longer an ability to center the hips to the front of the mat. However, if the student is unaware of the “chain” idea we’ve been talking about, they’ll hear your cue to “center to the front” and they’ll keep trying, much to their frustration. That’s why cueing to foot position in Warrior 1 is so effective because with the proper cue, something like “slightly turn your back foot in,” they can easily center their hips.
So, just to summarize: In Warrior 1, the hips are centered to the front of the mat (I could also say “the pelvis is centered to the front of the mat” because “hips” implies both hips or really pelvic positioning) and the front hip is slightly externally rotated and flexed and the back him is slightly internally rotated and extended.
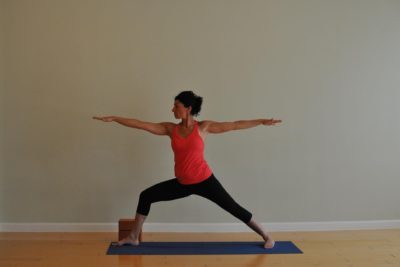
Now, in Warrior 2, the hips or the pelvis is no longer centered to the front of the mat, now the hips are turned to the side of the mat. They’re still level as in both poses, we want the hips or pelvis, to be level. But we’ve changed the way they face. Now, as we’ve done that, we still have a front hip in flexion and a bit of external rotation and a back hip in extension and a bit of internal rotation (you know those cues to “roll your inner thigh back?” That’s a reference to internal rotation). And, just like in Warrior 1, the “chain” paradigm applies so you want to be sure the back foot isn’t turned out too much or, you guessed it, the back hip will turn out too!
All this is a good reason to always cue from the bottom up as you can help your students get into proper alignment much better if their foundation is set up correctly. Use simple action words rather than long phrases and keep your eyes on your students rather than practicing with them. All these tips will help you connect more and make a bigger impact!
Let me know if this was helpful by commenting below!
One more thing: If you’re looking for more like this, download my “Ten Key Steps to Learning Anatomy” guide right here.
This was get great and provided clarity! Thank you!!
Rhonda, so glad! I’m thrilled this was helpful! Are there other poses you’d like to hear more about? Let me know!
Very clear explanation on pelvic alignment but not sure what your opinion is on placement of the back foot. Could you further elaborate please? 🙂
Michelle, hi and thanks for the question! In Warrior 1, the back hip is internally rotated so the back foot should turn slightly inward. For Warrior 2, the back hip is also internally rotated so the back foot should also be turned slightly inward. However, range of motion is expressed in degrees so you can think of it as a variable, meaning how MUCH you turn the back foot in might vary from person to person. But to give general group instruction, it would be fine to cue people to turn the back foot in. Does that help? Thanks, Karen
Very well explained. Thank you.
Wonderful! Glad it was helpful! Karen